Reset debian to minimal

Did you get a debian VPS server and it already has apache, sendmail and various other junk installed? And the server provider doesn’t have a minimal debian distribution to install? This should pretty much set the server back to a minimal distribution so you can install the web server and mail packages of your choice…

apt-get remove apache* sendmail* bind9* samba samba-common sasl2-bin; apt-get purge apache* sendmail* bind9* samba samba-common sasl2-bin


Setting up Webmin under Debian 7

Webmin is a web-based interface for system administration for Unix. Using any modern web browser, you can setup user accounts, Apache, DNS, file sharing and much more…

Login to your debian server via ssh

Install required packages

apt-get install perl libnet-ssleay-perl openssl libauthen-pam-perl libpam-runtime libio-pty-perl apt-show-versions python

Now we download and install webmin

wget http://prdownloads.sourceforge.net/webadmin/webmin_1.660_all.deb
dpkg –install webmin_1.660_all.deb

Once thats completed you should be able to access webmin on your server via https://yourservername_or_IP:10000


Setting the Timezone in Debian

Usually when you get a server for vpn/proxy purposes, it’s not in the same timezone as you…
Here is an easy way to set the TZ under debian

dpkg-reconfigure tzdata

That should bring up a screen like this:

Just select the city closest to you and hit enter.. and your done!


Setup your new Debian 7 server for OpenVPN

Ok, so you got your new server now.. Dedicated or VPS, doesn’t really matter.. now we have to configure it. For this example we will be using the Debian 7 64bit server version.

Make sure you have TUN/TAP enabled. If your using a VPS server then there should be an option in the control panel to enable it like this:

tun-tap

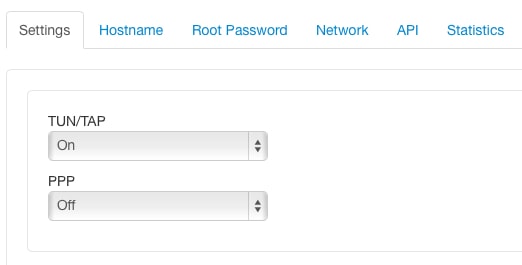
If your using a VPS server and you can’t see an option to enable it, contact your server provider about enabling it.

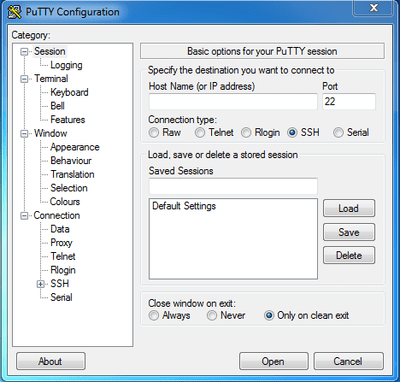
Now login to your server with SSH (see my previous post about putty). You should have gotten email from your server provider with the link and login details.

First you should change the root password, as they emailed your current one and you never know how may have read it 🙂
at the prompt enter passwd and hit enter. You’ll be asked to enter your new password twice and it will not show you what your typing in!

root@nl:~# passwd
Enter new UNIX password:
Retype new UNIX password:
passwd: password updated successfully
root@nl:~#

Lets update the server so that all the software on it is current..

apt-get update && apt-get -V upgrade

Now we’ll download the OpenVPN access server. I choose this version as it is the easiest to setup. It’s actually the commercial version of OpenVPN, but it’s free to use for up to 2 concurrent users which should be just fine to use for a personal proxy/vpn server.

You can download the latest openvpn-as here at the time of this post the file for debian 7 is openvpn-as-2.0.3-Debian7.amd64.deb so thats what I’ll be using in the example.

wget http://swupdate.openvpn.org/as/openvpn-as-2.0.3-Debian7.amd64.deb

Once that is downloaded we’l install it with

dpkg -i openvpn-as-2.0.3-Debian7.amd64.deb

If it all installed ok then the output should look something similar to this below.. your IP address will be different though

oot@nl:~# dpkg -i openvpn-as-2.0.3-Debian7.amd64.deb
Selecting previously unselected package openvpn-as.
(Reading database … 13364 files and directories currently installed.)
Unpacking openvpn-as (from openvpn-as-2.0.3-Debian7.amd64.deb) …
Setting up openvpn-as (2.0.3-Debian7) …
The Access Server has been successfully installed in /usr/local/openvpn_as
Configuration log file has been written to /usr/local/openvpn_as/init.log
Please enter “passwd openvpn” to set the initial
administrative password, then login as “openvpn” to continue
configuration here: https://81.4.127.151:943/admin
To reconfigure manually, use the /usr/local/openvpn_as/bin/ovpn-init tool.

Access Server web UIs are available here:
Admin  UI: https://81.4.xxx.xxx:943/admin
Client UI: https://81.4.xxx.xxx:943/

Now create a password for the new user openvpn as instructed

passwd openvpn

Once that’s done login to the Client UI address it gave you from your local machine. You should see something like this:

openvpn-login

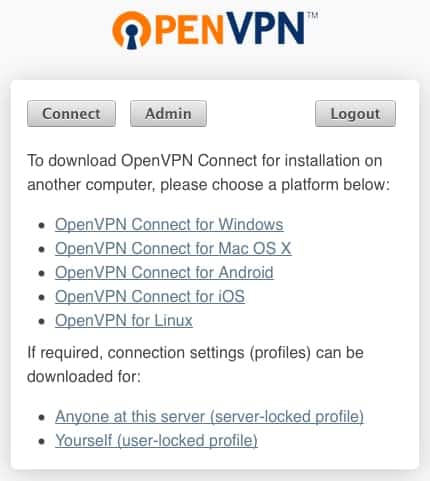
Now download the OpenVPN Connect client for whatever OS your running and use that to connect to the server.

Wow, we’re done. That was quick wasn’t it?

Using PuTTY to connect to a Server

Download the latest version of putty from here: Download
Once the file is downloaded, move the downloaded file (putty.exe) to a permanent location, such as your desktop.

NOTE: that this is not a program that you ‘install’.  It runs directly from whatever location you put it in.

Run putty.. it should look like this:
putty
In the “Host Name (or IP address)” field, enter the hostname or IP of the server you would like to connect to and click on Open.
You will then be prompted for your server username and password  via the terminal window.
Once authenticated you will be able to run commands on the remote system via the terminal window.
When your done on the server, end your session by typing ‘exit’, then press Enter.

Getting your own server

Having your own server can be useful in a log of ways.. Setup your bittorrent client and the server to save bandwidth at home (and nasty letters) or setup a VPN or proxy to tunnel your traffic through the server (useful for anonymizing your traffic of make it look like your from some other country – Netflix?)

There are tons of companies offering all kind of servers and types in all price ranges. Here are a few good choices:

Dedicated Server: (good for torrenting with great speed and price)

VPS (Virtual Private Server): (great for  VPN’s and proxies.. just pick your country)

  • Crissic.net have servers in florida.. great speed and great support
  • Ramnode.com have servers in the US and Netherlands

I’ll be showing you how to setup your server and software in my upcoming posts..

reorganization

reorganizationPlease have patience while I reorganize the website and contents here…
Things will only get better 🙂